The code for HiRISE can be found on GitHub.com/luksab/HiRISE.
Planing
Storyboard
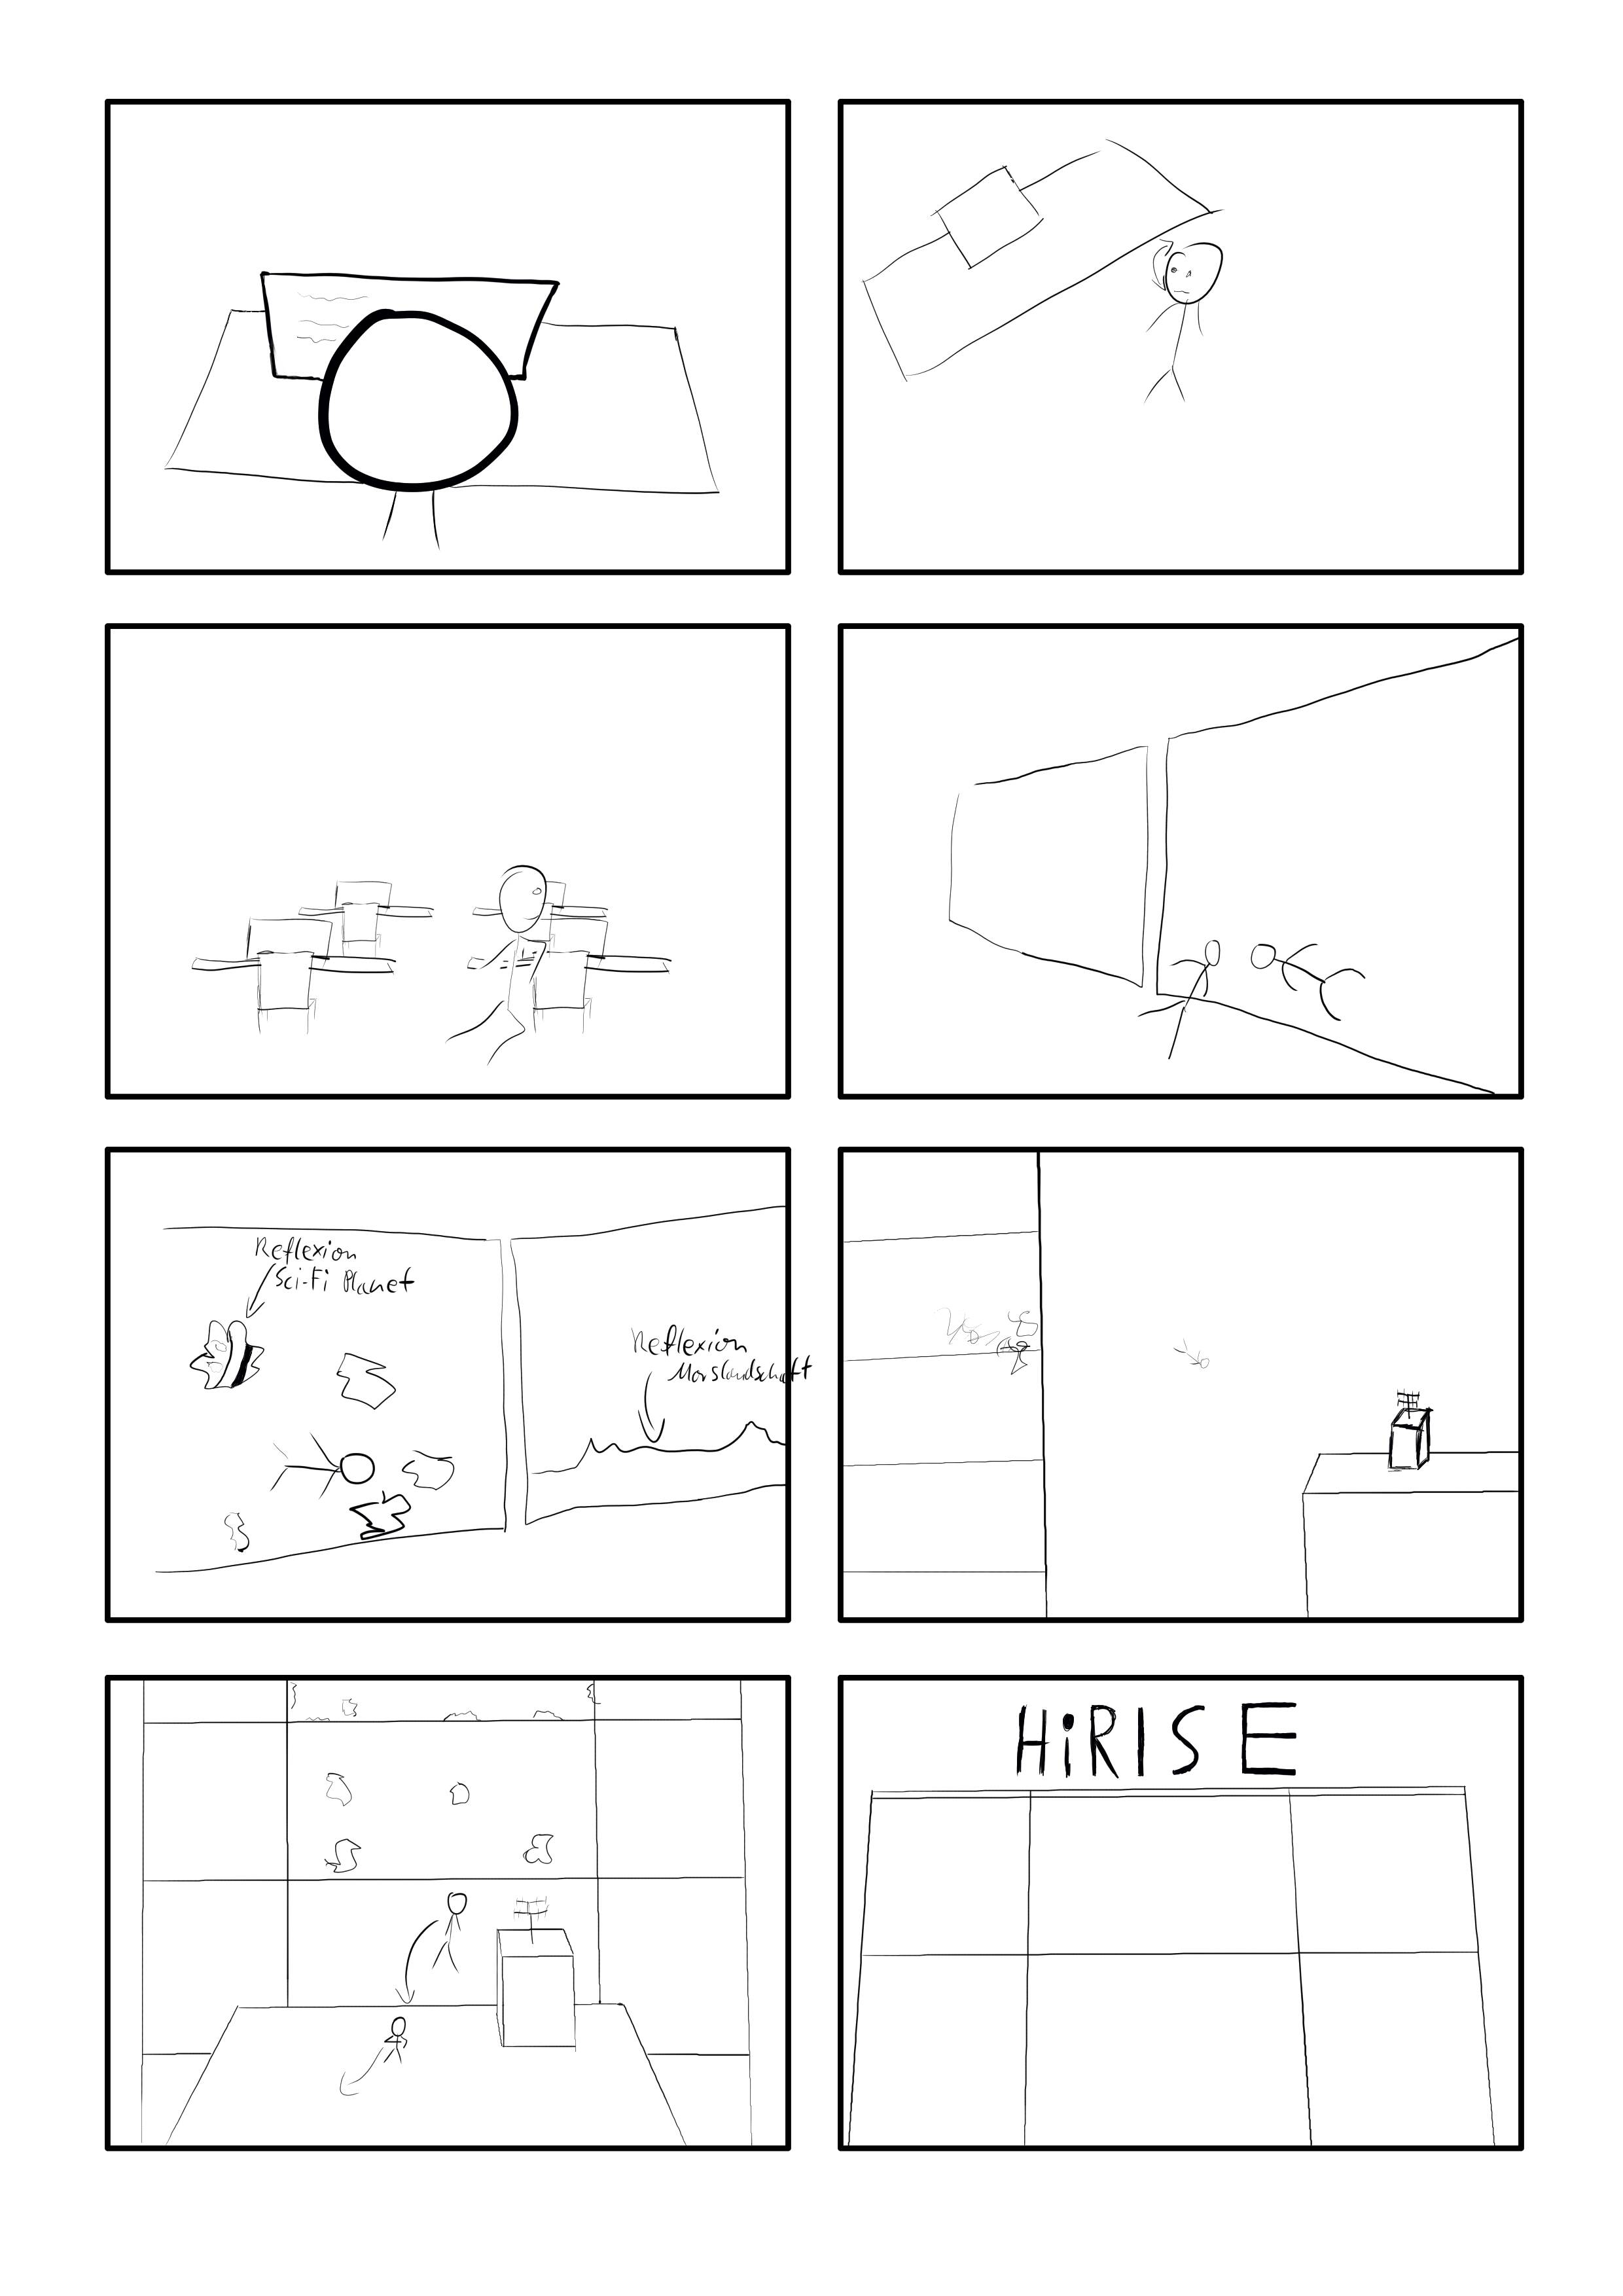
Story
The protagonist stands up from his desk and looks around - sirens sound, and he runs towards the window.
On hist way to the window, he is followed by a group of people and
does parkour over tables and other objects.
He breaks through the window, and we can see the building from the outside, which stands on a science-fiction Mars landscape. The protagonist then jumps across to another building and runs away. The protagonist falls in slow motion while the camera continues to move.
Features
Main - red means revised
- Minimal Cinematic Engine
- Export files from Blender, import into HiRISE
- use dae/obj
- protobuf or json as file-format? - Custom (floats in File, space-separated)
- Camera position, Skeletal animation
- Save camera positions in file
- Export files from Blender, import into HiRISE
- Rigging for humanoids
- has to work well for realistic movements
- Physical simulations for glass shards
-
can also bewas simulated in Blenderif not possible in real-time, for time reasons.
-
- Reflection in glass
- First, for the entire plane by duplicating the scene
- Other technique for many shards
- Reflect environment map
- Re-render environment map in real-time - not needed here for convincing results.
- e.g. SS (partially missing scene), Ray-tracing (to expensive), Environment Map
- Displacement Mapping + PDS Parser
- Load height data and color from PDS files
- Mars surface from HiRISE-data
- Sound
- Some music
- Code
- Music itself
- Some music
Optional Features
- Dynamic Subdivision Surface of the Mars surface
- Quality and performance improvement
- Procedural Textures for Mars-surface
- Color for surfaces without color information from HiRISE
- Didn’t work too well
- HDR-Effects, motion blur, focus blur
- Increase quality, if time is left over (priority decreasing)
Implementation
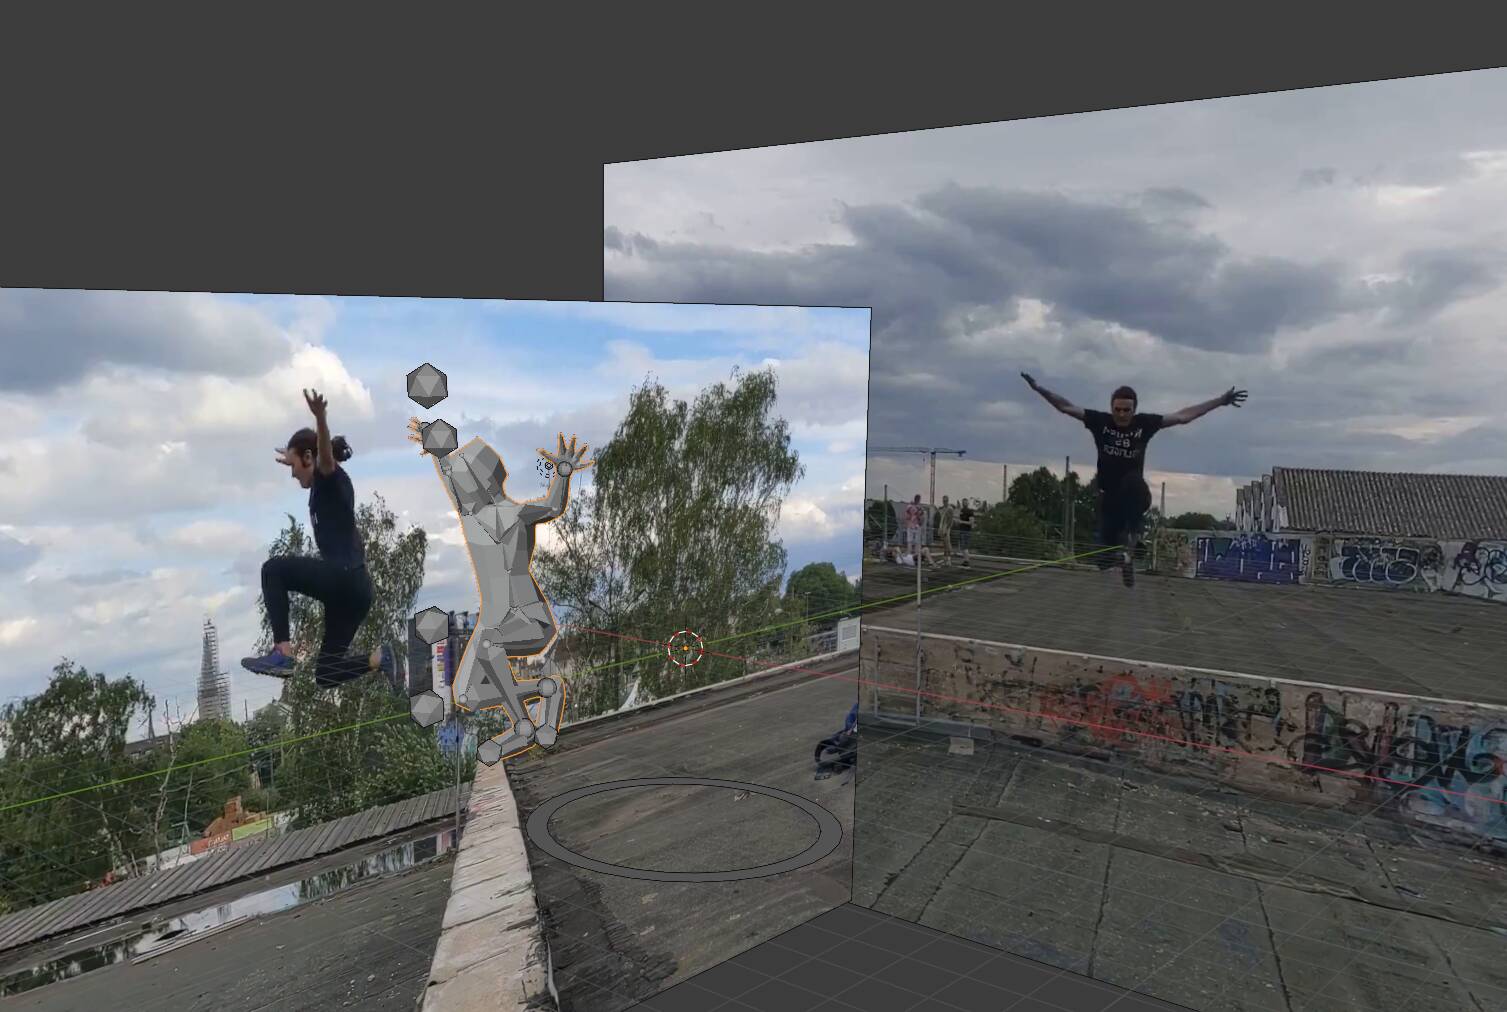
Character animation
Reference videos were used for more realistic results.
These were used in Blender as background when animating with inverse kinematics.

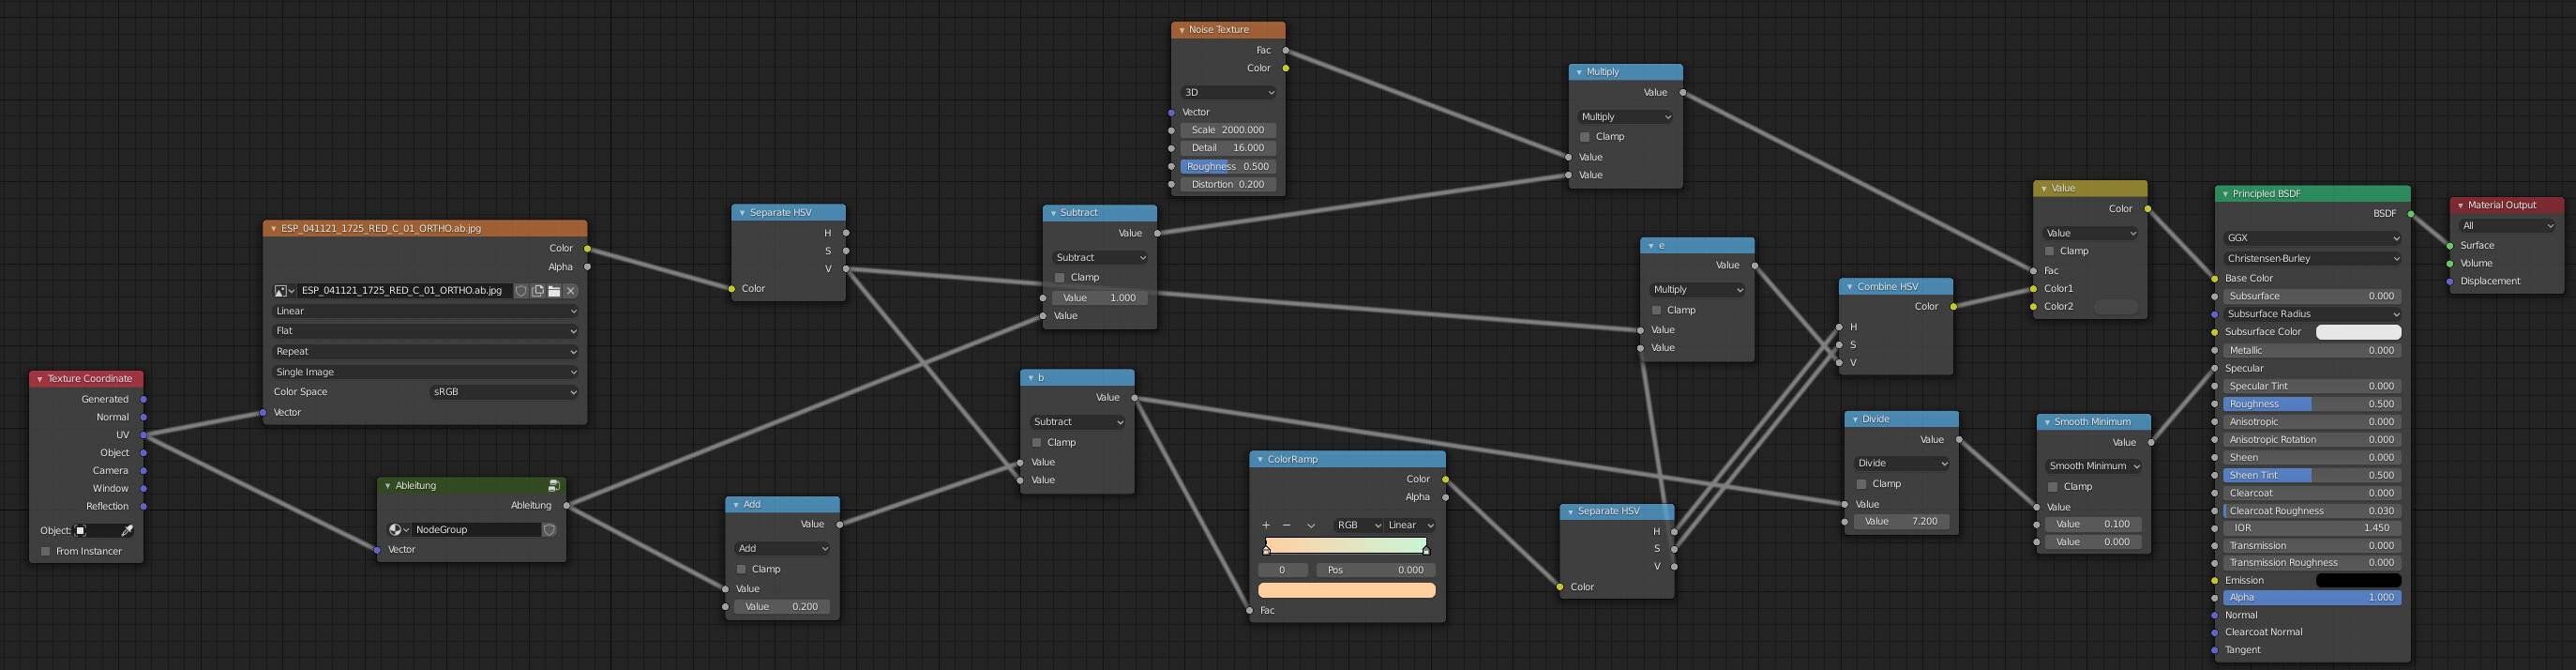
Mars surface
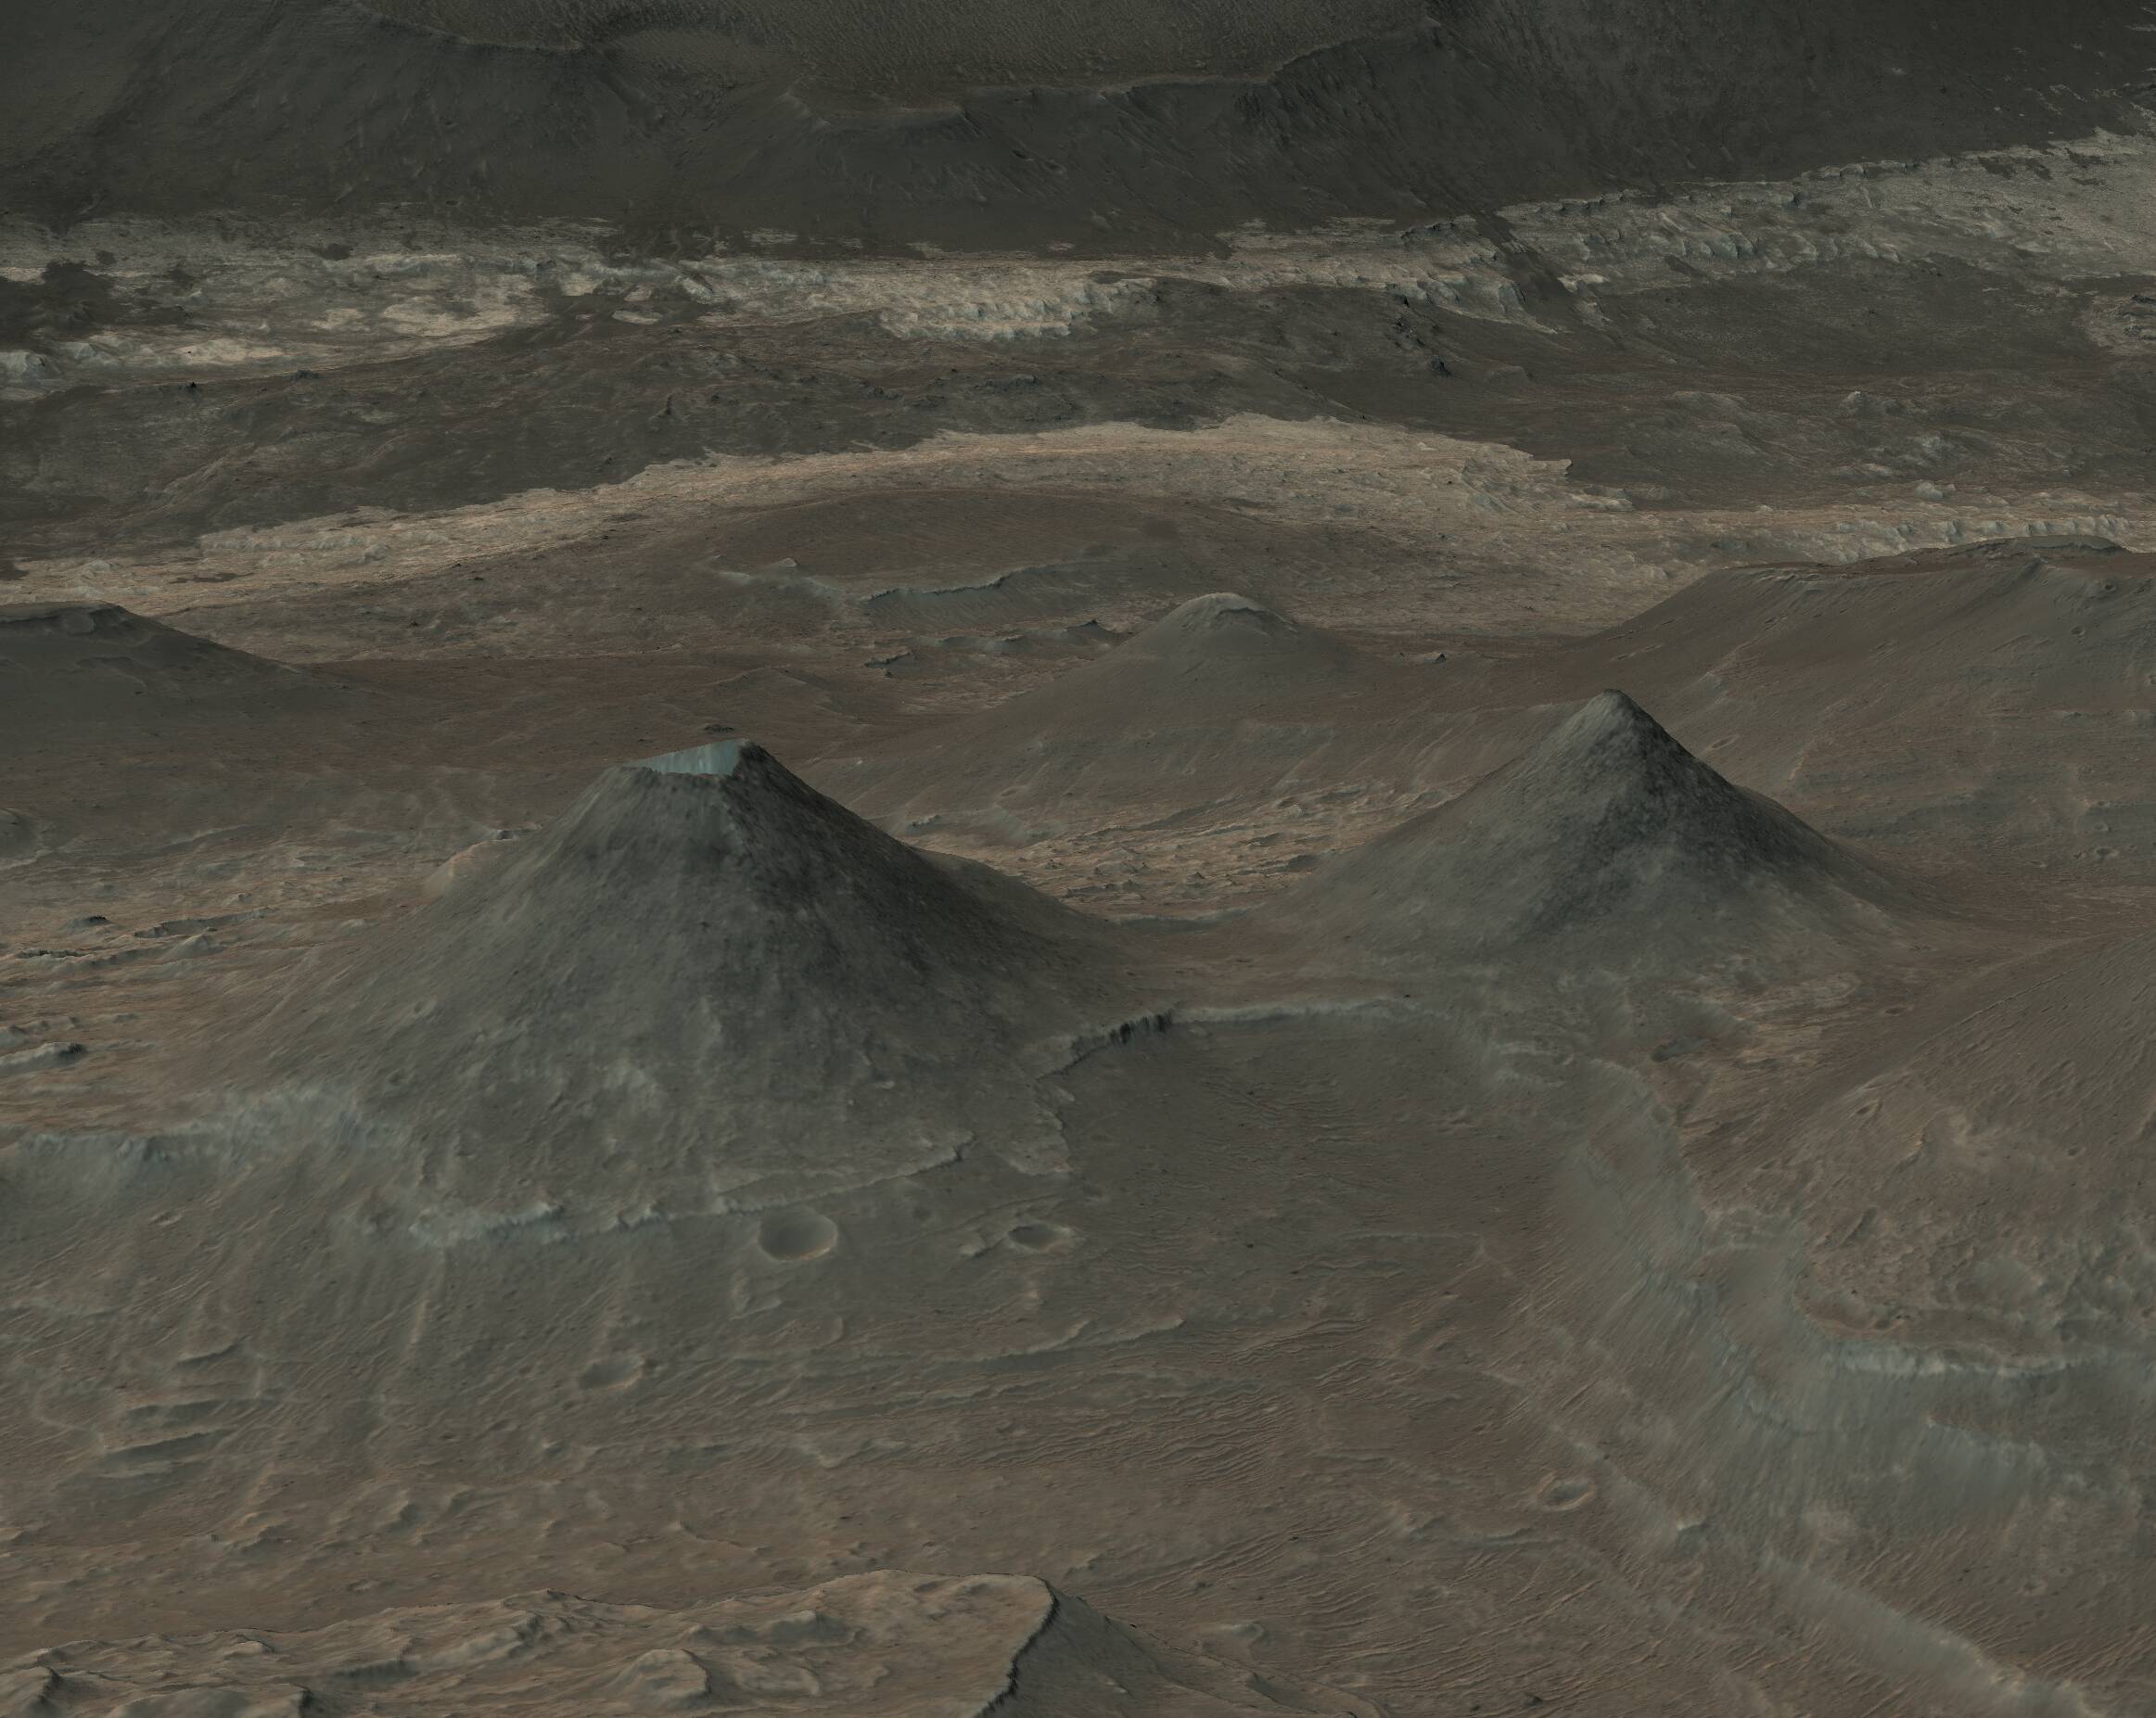
For the surrounding Mars surface, we used height maps and black-and-white images from the High Resolution Imaging Science Experiment (HiRISE, this is where the name for the project comes from). The exact data can be found at https://www.uahirise.org/dtm/dtm.php?ID=ESP_048136_1725 .
To combine both the height map and the black-and-white image into a 3D-model with color, we used a refence image with color from a different part of Mars to create a node-network in Blender to generate the color for each position.

A rendered image of Mars in HiRISE
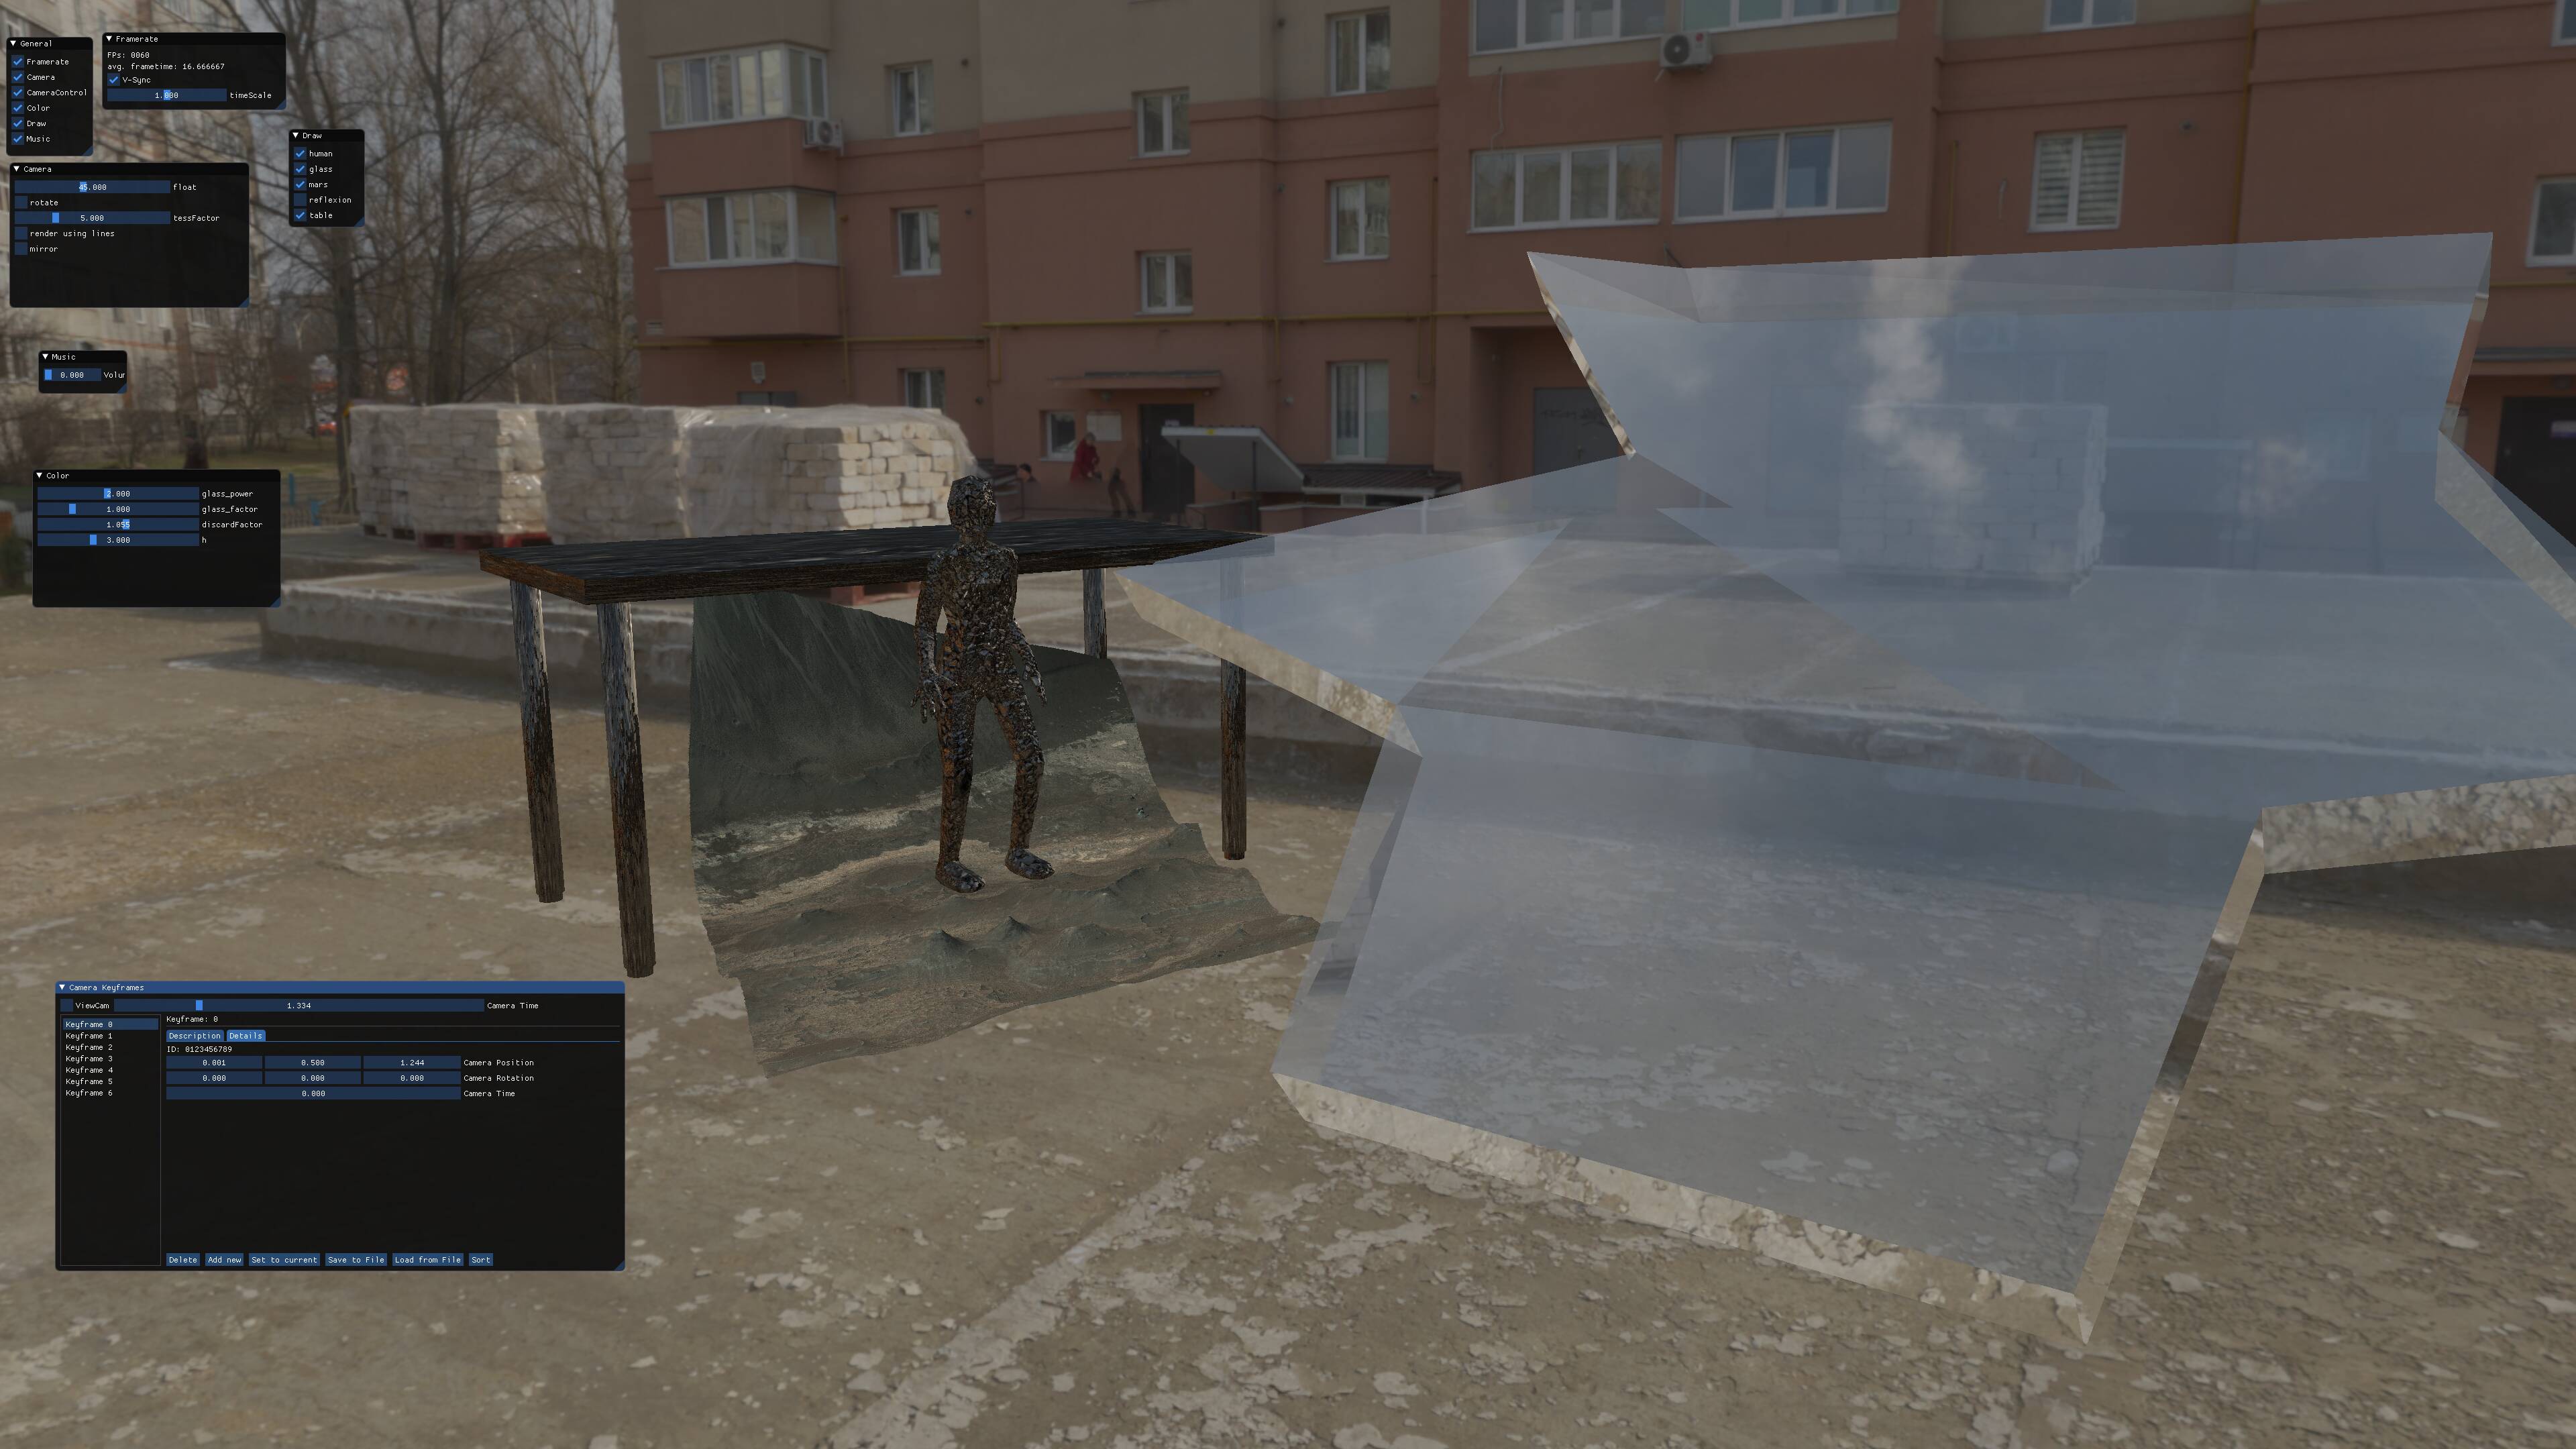
Camera and UI
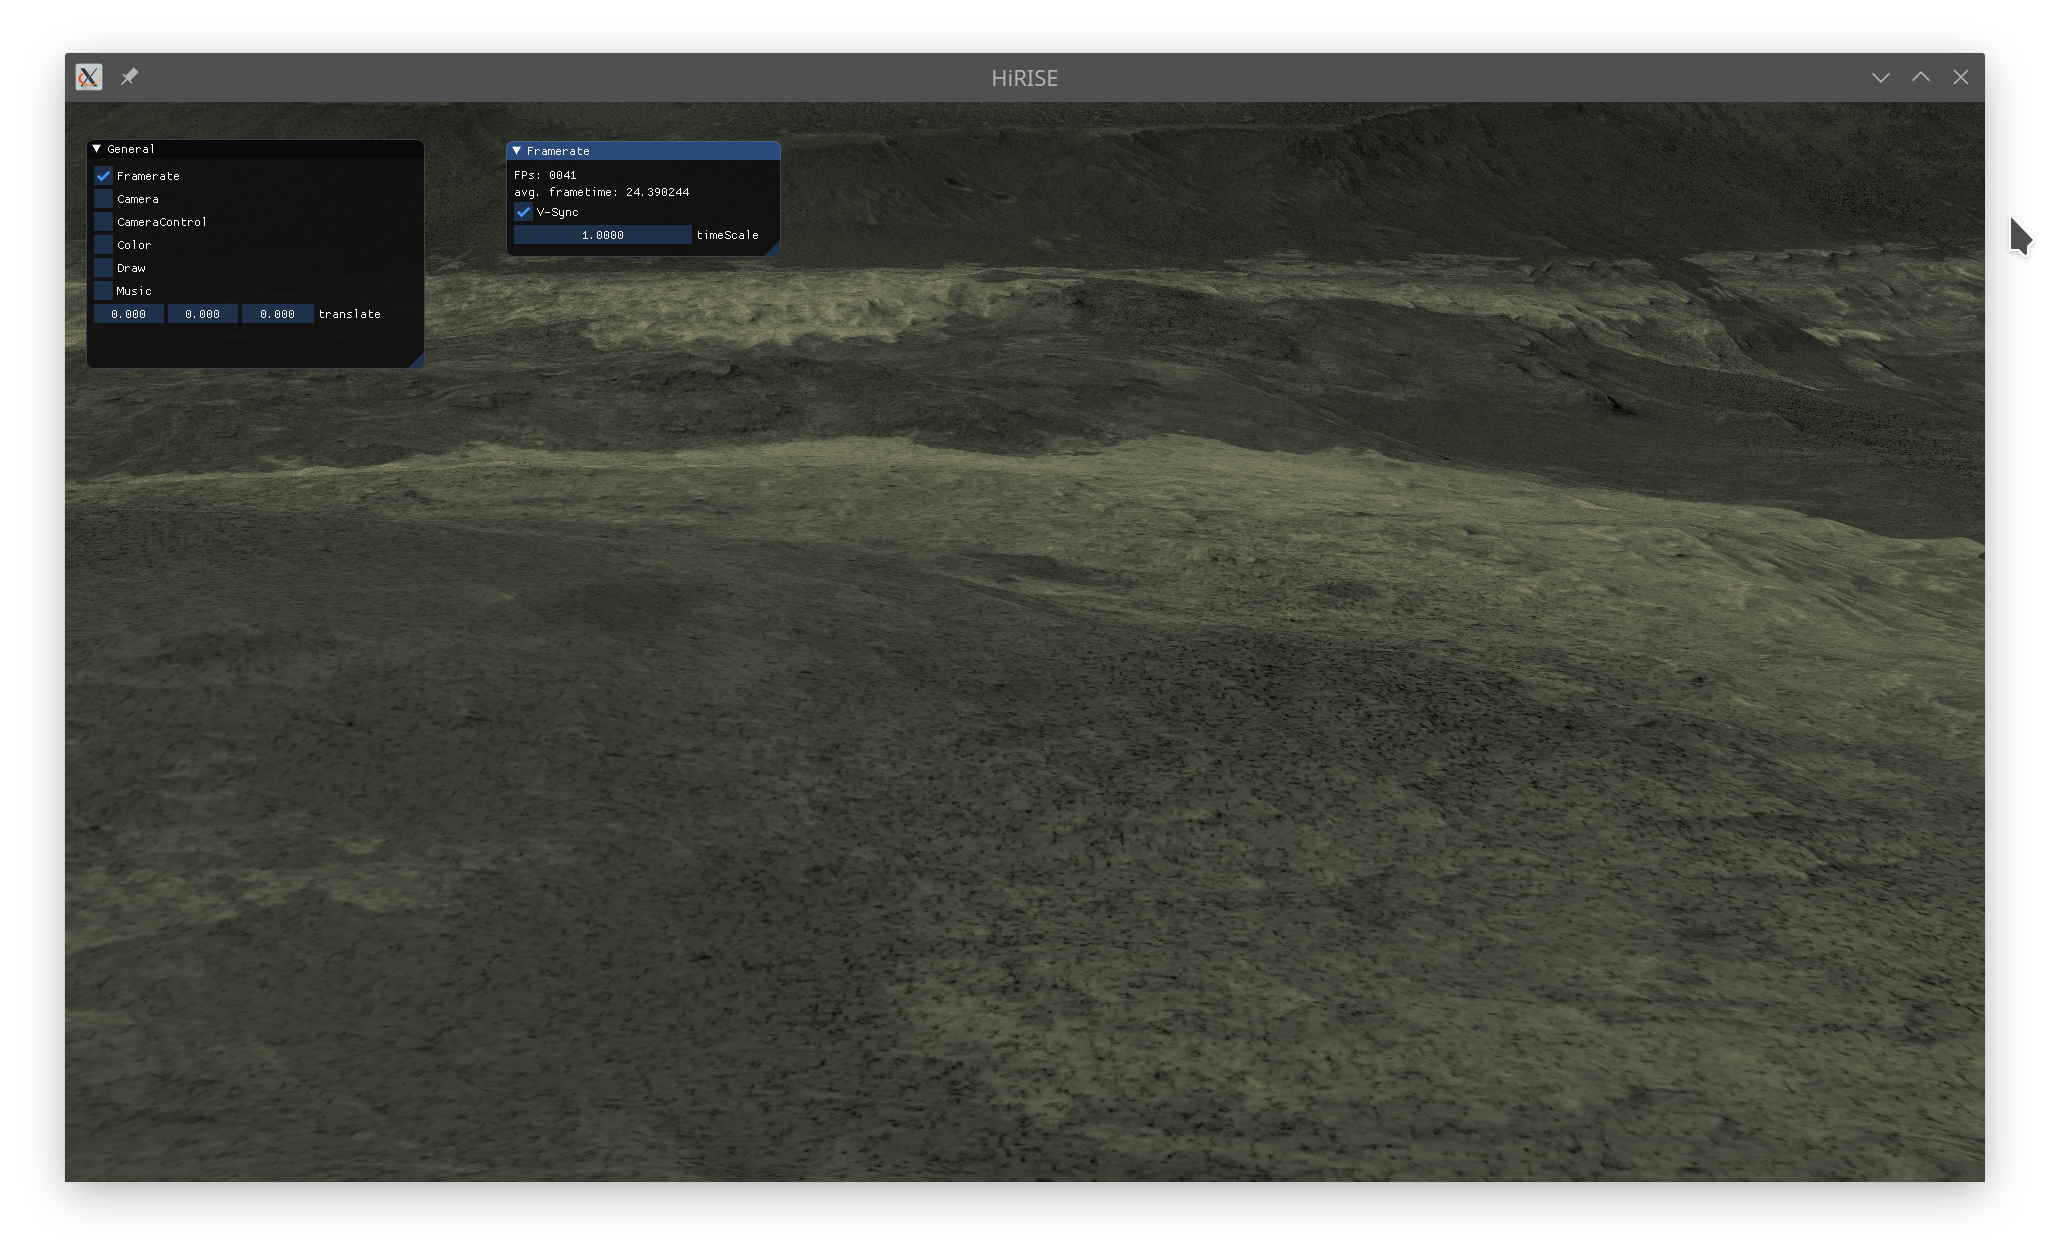
Here is a screenshot of the development environment with all UI-elements enabled:
Camera movement
The camera is moved along splines, which are defined by points traversed by the camera. This is the first test of the system, where the tangents aren’t set correctly, which results in jittery motion.
The camera points are pairs of time and position, which are sorted by time and saved in a std::vector<std::pair<float, std::vector<float»>.
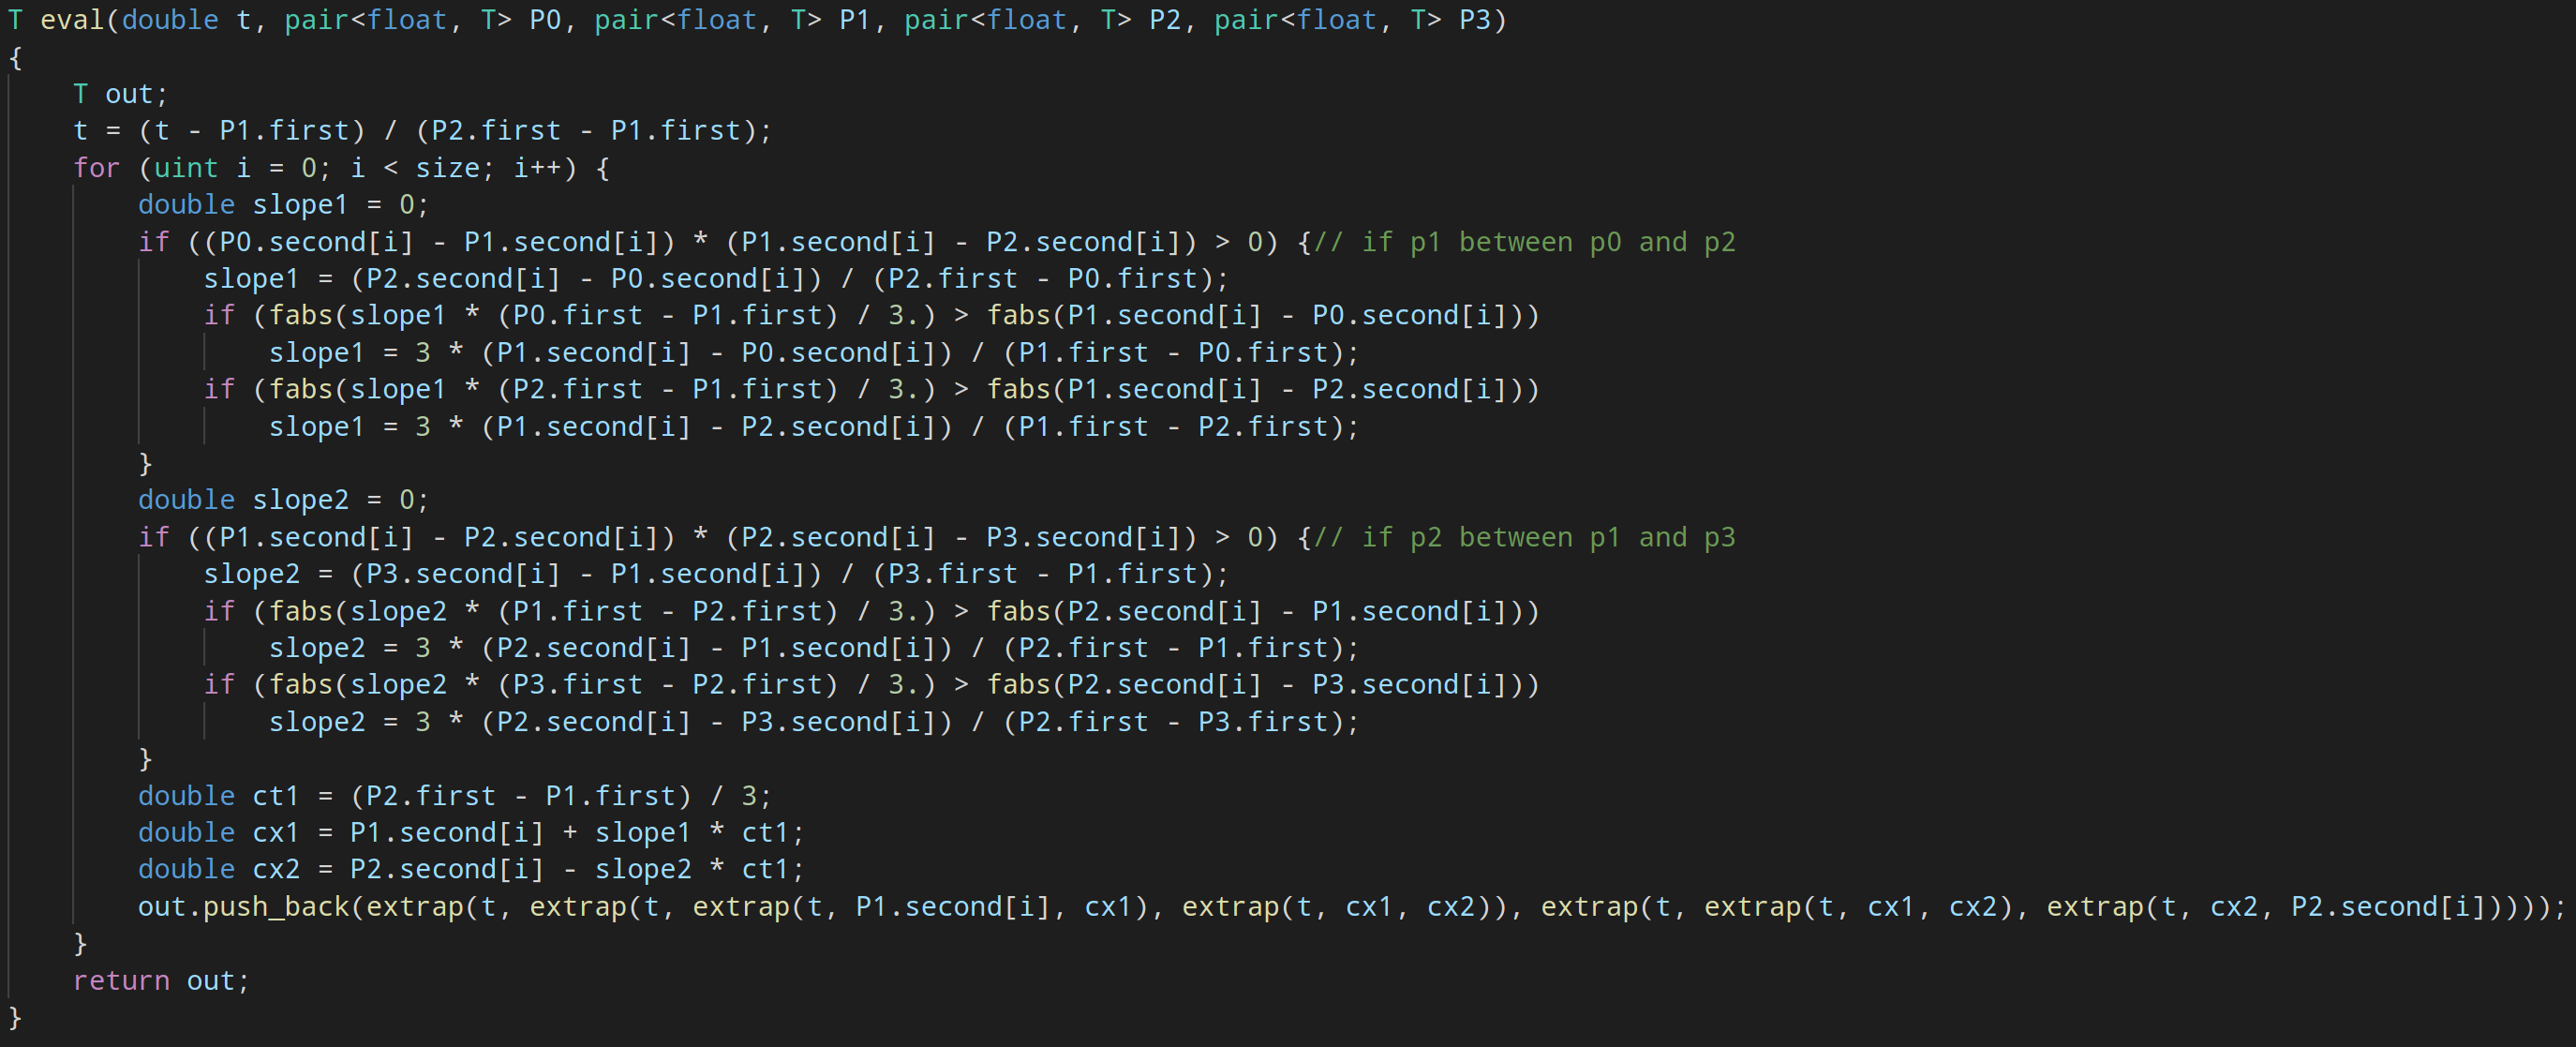
A curve is interpolated between the ith and the i+1st point by passing the points i-1, i, i+1,and i+2 and the global time to eval.
eval first computes the slope at the control points of p1 and p2, which are (p2-p0).normalize() and (p3-p1).normalize(), if p1 is between p0 and p2 and p2 is between p1 and p3, otherwise they are limited to the x-coordinate.
This is done, so the maxima and minima have symmetrical extrema.
PBR & HDRI
The lighting outside the building is done using an HDRI, like in https://learnopengl.com/PBR/IBL/Specular-IBL . Those shaders are used in modified form for PBR-objects.
Skeletal animation
Importing skeletal animations is somewhat fragile and need special care when exporting from Blender, as is described in blenderExport to avoid scenarios, such as:
Here, we can see the beginning animated in Blender.
Reflection
For the large mirror with real-time reflections, the scene is rendered twice. Once normally and once reflected and with a stencil in the form of the mirror. In the main file, this is done around line960.
For all the small glass shards, only the environment map is reflected in them. This is done entirely in the shader code.
Models
Mars
The Mars surface is entirely created from textures and the actual model therefore is only a relatively high-resolution rectangle. This high-resolution is needed, as the Nvidia gtx 1070ti used for rendering only supports a maximum tessellation level of 64, which is not enough to tessellate a plain rectangle for the Mars surface. The color texture is precomputed in a compute shader to save on performance at runtime. This optimization brought a performance increase of almost 10x, as calculating the colors is fairly expensive.
Table, chair, screen, USB-Stick
All these objects were modelled in Blender by me by combining primitives and editing the resulting mesh.

HiRISE Text
The text at the end was also created in Blender by triangulating a text-object.
Simulating glass shards
Originally, the plan was to create a full simulation for the glass and have it shatter and interact with the scene.
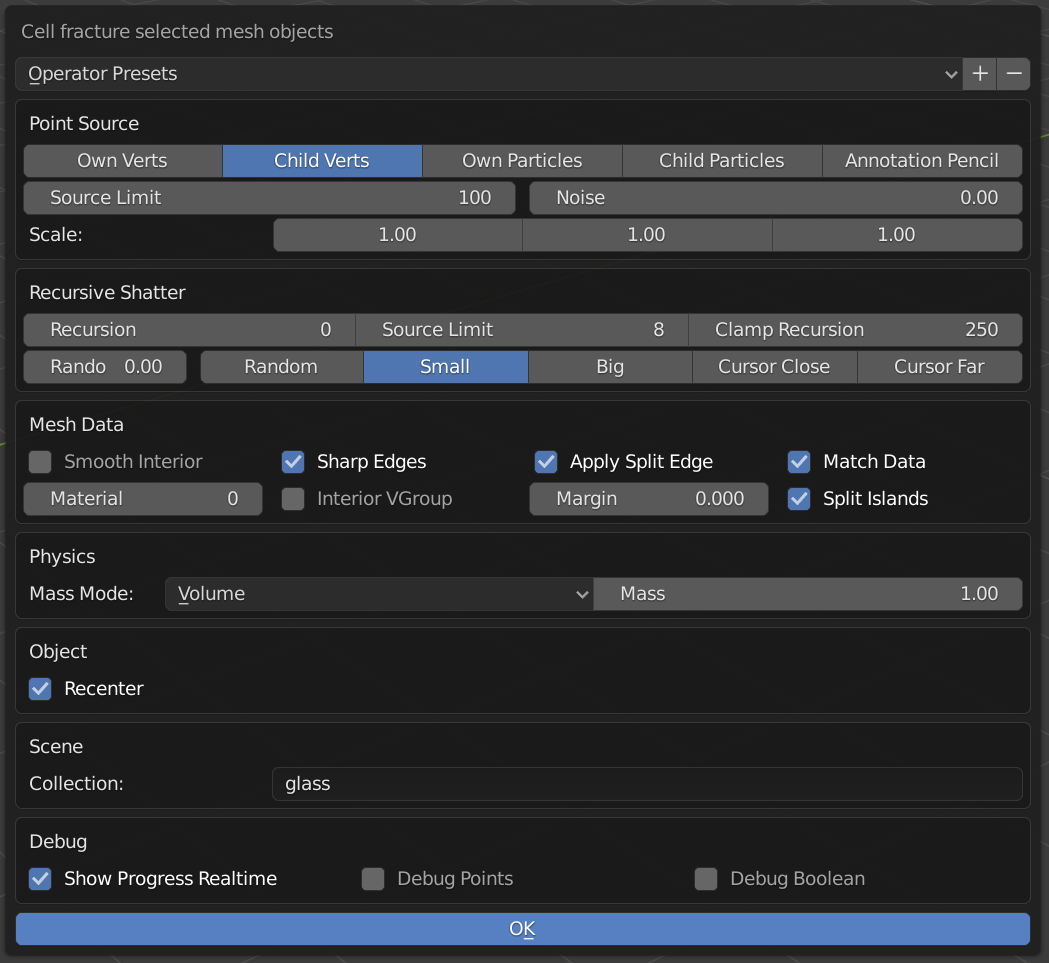
This was however not possible in the timeframe of the project and I used the Blender Add-on Cell Fracture and the rigid body simulation in Blender to replace the simulation.
Cell Fracture is used to initially shatter the glass and each resulting object is simulated in the scene using Blenders rigid body simulation.

Extras
Shader auto-reload
For a faster development cycle of shaders, I implemented a shader class with the reload function, which reloads the shader code, and checkReload, which checks, if the file was changed since the last load/reload. With these two functions, it is possible to check if the shader code needs reloading and if it does, to reload it. These steps need additional delay, as writing a file to disk takes some time and loading a partially written shader file result in crashes. The reloadCheck function is responsible for this and waits 20ms, before loading the shader. This increases the frame time for this single frame, but this is ok for development, as shaders normally are not reloaded every frame.
Procedural Textures for the Mars-surface
To mitigate the low pixel density of the HiRISE data, I experimented with adding different types of noise to the texture.